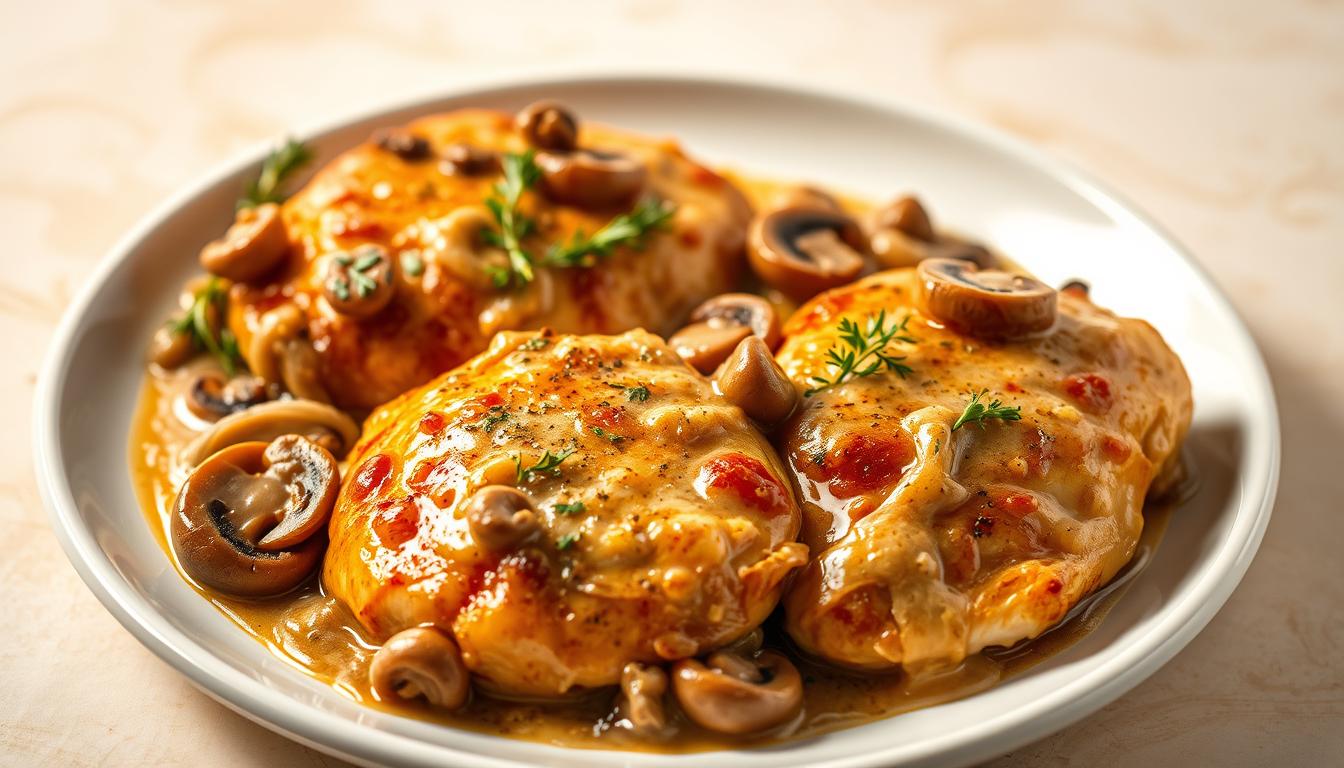
Get ready to create a meal that brings warmth to your table. This guide shows you how to make smothered chicken breast — tender, juicy poultry covered in a rich, savory gravy that everyone will love. You’ll master simple techniques that turn everyday ingredients into something special.
Our step-by-step approach covers everything from choosing the right chicken cuts to achieving the perfect gravy consistency. Whether you’re new to cooking or already confident in the kitchen, these instructions make the process smooth and foolproof.
You’ll explore both traditional Southern-style smothered chicken breast recipes and modern variations you can easily customize to your taste. The result is a hearty, comforting dish that feels like home with every bite.
It’s no wonder smothered chicken breast has become a true classic in American kitchens — it combines simplicity with rich, soul-satisfying flavor. Follow along to bring that same comfort to your own dinner table.
Introduction to a Comforting Smothered Chicken Recipe
Unlock the secrets to preparing a beloved American classic that delivers rich flavors and tender results. This approach combines heritage techniques with modern kitchen efficiency.
Overview of the Dish
This preparation method involves cooking poultry directly in its own savory gravy. The technique allows flavors to develop deeply during the slow simmering process.
You’ll achieve perfectly seasoned results with aromatic vegetables creating complex taste layers. The method ensures every bite carries the full essence of the ingredients.
Why You’ll Love This Recipe
This comfort food classic brings families together around the dinner table. It works equally well for busy weeknights and special weekend gatherings.
The total preparation time is about 90 minutes with minimal hands-on work. You get restaurant-quality results with home-cooked simplicity and heartwarming flavors.
| Preparation Aspect | Traditional Method | Modern Approach |
|---|---|---|
| Cooking Time | 2+ hours slow simmering | 75 minutes optimized timing |
| Ingredient Prep | Extensive chopping and measuring | Streamlined preparation steps |
| Flavor Development | Long, slow flavor building | Efficient layering techniques |
| Weeknight Friendly | Best for weekends | Perfect for any night |
This versatile dish adapts to various cooking methods while maintaining its signature texture. Home cooks consistently return to this reliable meal for its satisfying results.
Essential Ingredients for an Exceptional Smothered Chicken Recipe
Success in the kitchen starts with gathering the right building blocks for your culinary creation. Quality components transform simple recipes into memorable meals that satisfy both taste and soul.
Fresh Produce and Aromatics
Your aromatic foundation begins with fresh vegetables chopped to perfection. You’ll need yellow onion, celery, garlic, and carrots prepared in specific sizes.
Proper cutting ensures even cooking and optimal flavor release. These fresh ingredients create the complex taste layers that define this comforting dish.
Pantry Staples and Seasonings
Basic pantry items form the backbone of your recipe. All-purpose flour serves dual purposes for coating and thickening.
Seasonings like salt, pepper, and poultry seasoning balance the flavors perfectly. Low-sodium broth gives you control over the final salt level.
For quicker versions, cream of chicken and mushroom soup provides instant savory depth. Both traditional and easy variations deliver excellent results with proper technique.
How to Make Smothered Chicken Breast
Your culinary journey starts with preparing the protein component using time-tested methods. These initial steps create the foundation for the rich flavors and perfect texture you’ll achieve.
Preparing and Seasoning the Chicken
Begin by patting your poultry pieces completely dry with paper towels. This crucial step ensures proper browning and helps the coating adhere well.
Season generously with salt and pepper. These basic seasonings enhance the natural flavor before cooking begins.
For even cooking, consider pounding thicker portions of the meat. This technique prevents dry edges while the center reaches safe temperature.

Coating with Flour for a Perfect Crust
Spread all-purpose flour in a shallow bowl for your dredging station. This setup makes coating each piece quick and consistent.
Dredge the poultry one piece at a time in the flour mixture. Shake off any excess to prevent clumping and ensure an even coating.
The flour serves multiple purposes. It creates a golden crust when browned and helps seal in natural juices.
After coating, set aside the prepared pieces on a clean plate. Keep them separate so the coating doesn’t become gummy before browning.
Creamy and Flavorful Gravy Techniques
The foundation of any memorable comfort dish lies in the quality of its accompanying sauce. Mastering these techniques ensures your meal reaches its full potential.
Proper gravy construction transforms simple ingredients into something extraordinary. You’ll learn both traditional and modern approaches.
Sautéing Vegetables to Build Depth
Begin by pouring off excess oil from your skillet, leaving three tablespoons of flavorful fat. Reduce the heat to medium-low for optimal cooking.
Add onions, celery, garlic, and carrots to the pan. Sauté these aromatics for seven to eight minutes until they soften. The vegetables should retain slight texture while releasing their natural oils.
This process creates complex flavor layers in your sauce. Sweet onions combine with earthy celery and pungent garlic for perfect balance.
Thickening the Gravy with Flour and Stock
Sprinkle three tablespoons of flour over the sautéed vegetables in your skillet. Stir constantly to coat every piece evenly.
Cook the flour mixture for one minute to eliminate raw taste. This creates a smooth roux that emulsifies with the fat and vegetables.
For a quicker alternative, combine cream of chicken and mushroom soup with water. This creates an instant creamy sauce with rich flavor.
The traditional method yields lighter gravy that highlights the poultry flavors. The cream-based version offers indulgent texture with less effort.
Cooking Process: From Browning to Simmering
Proper heat management and timing are crucial for creating tender, flavorful results. This phase transforms your prepared ingredients into a complete dish.
Browning the Chicken for Rich Flavor
Begin by heating vegetable oil in your Dutch oven over medium-high heat. Wait until the oil shimmers before you add chicken pieces.
Cook the poultry in batches to avoid overcrowding the pan. Place each piece skin-side down and cook for 4-6 minutes without moving them.
This creates a beautiful golden-brown crust. Adjust the heat as needed to prevent burning while ensuring deep caramelization.
| Cooking Method | Browning Time | Final Cooking | Equipment Needed |
|---|---|---|---|
| Stovetop Simmering | 4-6 minutes per batch | 30-40 minutes simmer | Dutch oven or large skillet |
| Oven Baking | 3-4 minutes light browning | 25-30 minutes baking | Skillet + baking dish |
| Bacon Variation | Light browning in drippings | 25-30 minutes uncovered | Oven-safe skillet |
Slow-Simmering for Tender Meat
After browning all pieces, add broth and seasonings to the pan. Bring the mixture to a boil before reducing heat to low.
Nestle the browned poultry back into the sauce with accumulated juices. Partially cover and simmer for 30-40 minutes.
The slow cooking allows the meat to become incredibly tender. It absorbs the gravy’s rich flavors while releasing its own juices.
Tips for Keeping Your Chicken Juicy and Tender
Transform your cooking results by focusing on moisture retention methods that guarantee tender outcomes. These techniques prevent the common problem of dry, tough poultry that disappoints at the dinner table.

Mastering these simple approaches ensures every bite remains moist and flavorful. You’ll create restaurant-quality texture with home kitchen reliability.
Using the Right Temperature and Timing
Overcooking is the primary reason poultry becomes dry and tough. Chicken breasts and tenders can transition from perfect to overdone in just minutes.
Use a reliable meat thermometer to monitor internal temperature. Remove your poultry from heat immediately when it reaches 165°F (74°C). This precise timing prevents moisture loss.
Bone-in pieces require longer cooking time, typically 30-40 minutes. Boneless cuts cook faster, needing only 25-30 minutes. Adjust your timing based on the cut you’re preparing.
Partial covering during simmering creates ideal moisture conditions. This technique allows some evaporation while retaining enough liquid to keep the meat tender.
Select pieces of similar size for even cooking. Consider pounding thicker portions to uniform thickness before seasoning. This ensures consistent results throughout your dish.
Let the cooked poultry rest for 3-5 minutes before serving. This allows juices to redistribute evenly throughout the meat. The result is moist, flavorful bites every time.
Serving Suggestions and Perfect Side Dishes
A great main dish deserves equally impressive partners to create a harmonious and memorable plate. The right accompaniments enhance the rich gravy and tender texture of your creation.
You can tailor your sides for a lavish Sunday supper or a simple weeknight meal. This flexibility makes the dish a reliable favorite for any occasion.
Mashed Potatoes and More Comfort Sides
Creamy mashed potatoes are a classic choice for a reason. They provide a fluffy base that absorbs the savory gravy beautifully.
For a complete comfort food experience, add fresh, buttery rolls or biscuits. They are perfect for dipping into the flavorful sauce.
Other excellent starchy options include fluffy white rice or a sweet corn casserole. These sides add substance and help balance the meal.
Complementary Vegetable Options
Traditional Southern green beans offer a wonderful texture contrast. Arkansas-style green beans with a savory twist are another fantastic choice.
For a lighter option, consider roasted broccoli or a crisp KFC-style coleslaw. These provide bright flavors that cut through the richness.
You can also serve Southern collard greens for an authentic touch. The versatility of this dish allows you to mix and match sides to please everyone.
Exploring Recipe Variations and Personal Twists
Elevate your cooking experience with creative adaptations that transform classic dishes into personalized favorites. This bacon and cheese variation offers a simplified approach with indulgent flavors.
You’ll discover how to make smothered chicken with a delicious twist. The method incorporates crispy bacon and melted cheese for extra richness.
Bacon and Cheese Preparation Method
Begin by cooking half a pound of bacon until crisp in your skillet. Reserve the flavorful drippings for browning the poultry pieces.
Coat 1½ pounds of boneless tenders in a mixture containing ½ cup all-purpose flour with seasonings. Brown them in the bacon-infused pan for optimal flavor development.
Add sliced onion to the same skillet and cook for five minutes. The caramelized onions create a sweet foundation for your sauce.
| Preparation Step | Traditional Version | Bacon-Cheese Variation |
|---|---|---|
| Fat Source | Vegetable oil | Bacon drippings |
| Sauce Base | Flour roux + broth | Cream soup + water |
| Cooking Time | 30-40 minutes simmered | 25-30 minutes baked |
| Final Toppings | None | Cheese + bacon crumbles |
Combine cream of chicken and mushroom soup with one can of water. Pour this easy sauce over your browned poultry and onions.
Bake uncovered at 350°F for 25-30 minutes. Top with Italian blend cheese and reserved bacon before returning to the oven briefly.
This chicken recipe works well with various cuts. Adjust timing if using breasts or other pieces to ensure proper cooking.
Storage, Freezing, and Reheating Your Smothered Chicken
Proper storage methods ensure your delicious creation remains enjoyable for future meals. You need to understand the best ways to preserve both the poultry and gravy quality.
Best Practices for Leftovers
Refrigerator storage has limitations for this dish. The gravy maintains quality for only two days when sealed properly.
After this time, the sauce begins to separate and develop unpleasant textures. Freezing offers a better long-term solution for preserving your meal.
Tips to Preserve Gravy Texture
Allow your cooked dish to cool completely before storage. Transfer leftovers to an airtight container for freezing.
The combination maintains quality for up to three months in the freezer. Thaw overnight in your refrigerator for best results.
Reheat in a 350°F oven for about 20 minutes. This method preserves the gravy’s smooth consistency better than microwave heating.
Remember to set aside portions for freezing within two hours of cooking. This timing ensures food safety and optimal quality.
Nutritional Insights and Ingredient Benefits
This nutritional breakdown provides valuable insight into the health profile of this comforting dish. You can use this data to understand how different ingredients affect the final meal.
Approximate Caloric and Nutrient Breakdown
The traditional recipe offers a balanced meal with about 532 calories per serving. It provides 38 grams of protein and 26 grams of fat.
You get 4 grams of fiber and only 7 grams of sugar. The sodium content stays low at 237mg when you use low-sodium chicken broth.
In contrast, the easy variation has 745 calories and 61 grams of protein. Its fat content rises to 45 grams.
This version contains 1,203mg of sodium. The significant difference shows how your ingredient choices matter.
Benefits of Key Ingredients
The high protein content helps with muscle maintenance and keeps you feeling full. This makes the dish very satisfying.
Vegetables like carrots contribute a massive 11,263 IU of Vitamin A. The fiber from these ingredients supports good digestion.
Using low-sodium broth as a base lets you control salt levels. Each teaspoon of added salt increases the sodium count.
Remember, these values are approximations. They can change based on the specific brands you select.
Conclusion
With these techniques at your fingertips, you’re ready to create memorable family meals. You’ve mastered everything from proper seasoning to achieving that perfect gravy consistency. This smothered chicken recipe delivers restaurant-quality results with home kitchen simplicity.
The flexibility of this comfort dish allows you to adapt it to any schedule. Whether you choose the traditional method or quick variations, you’ll create a satisfying meal. Your new skills in temperature control and timing will serve you well beyond this specific recipe.
Now it’s time to add chicken to your shopping list and set aside some kitchen time. Gather your ingredients and experience why this smothered chicken remains a beloved staple. Your family will appreciate the tender chicken breasts and rich flavors you create.
End your meal with a sweet touch from our **Cake Dreams** collection.
Looking for dinner ideas? See our **Evening Eats** recipes.
For more tips, visit the kitchn